About Me

My photo
Back in the 80s, I wrote a book called "Voyaging on a Small Income", which was published and sold astonishingly well. It’s become almost a “classic” and is probably why you’ve found this site! I’ve been living aboard and sailing since the 70s. Nine different boats have been home, sometimes for several months, sometimes for many years. I love the way of life, the small footprint and being close to Nature. I’m a great fan of junk rig and having extensive experience with both gaff and bermudian rig, I wouldn’t have any other sail on my boat. It’s ideal as a voyaging rig, but also perfect for the coastal sailing that I now do. I’d rather stay in New Zealand, not having to keep saying goodbye to friends, than go voyaging, these days. Between 2015 and 2021, I built the 26ft "FanShi", the boat I now call home. For the last 45 years or so, my diet of choice has been vegetarian and is now almost vegan. I love cooking and particularly enjoy having only myself to please. I am combining all these interests (apart, perhaps, from junk rig!) in this blog. I hope you enjoy it. I also have other blogs: www.anniehill.blogspot.com and http://fanshiwanderingandwondering.wordpress.com

18 December 2023

Courgette curry


I find it hard to get excited about courgettes. Baby ones, fried in good olive oil and garlic are delicious, but that’s largely because of the olive oil and the garlic. They sop up the flavours well.    They are also good in ratatouille, especially with cannellini beans, for the same reason and indeed, can be used in all sorts of soups and stews; however when there’s a glut of them, it isn’t usually the time of year that you want to eat soup and stew.  Now I realise, that to many people, curry is not only similar to a stew, but because of the chilli and warming spices, might seem even less appealing in hot weather, but I adore curry and can eat it any time and in any weather. so to me it is a perfect way of using a bounty of courgettes.  I already have a recipe for courgette with chana dal, however this recipe is is quite different and more of a side dish than a main one, althoughI have some suggestions for using it as a main course.  This is a pretty straightforward recipe and I think most people would be happy to tackle it, but because it uses non-standard ingredients, I'll call it a Curry for Cooks.

This recipe is based on one of Swasthi's recipes and I think it’s a great way to cook courgettes.    The coconut milk makes it rich and substantial and all it needs is some rice to go with it, but of course a pan of dal would turn it into a generous meal. Alternatively, you can serve it with quinoa, whose protein will turn this into a fully-nutritious meal. I confess to finding quinoa worthy, but dull, particularly compared to brown basmati rice. However, if you're concerned about your protein intake, it's a good choice.

Even though this is made with Kashmiri chilli powder, rather than chilli flakes or cayenne, it packs quite a zing. If you don’t like too much heat in your curry, reduce the amount of chilli powder.

Serves 2 for a main course, 4 as a side dish

Ingredients 

1 tbsp coconut oil 
1/8 tsp mustard seeds 
1/2 tsp cumin seeds 
1 green chilli pepper, minced 
1 tsp ginger paste 
1 tsp salted lime or lemon, finely diced
1 medium onion, finely diced 
3/4 tsp garam masala 
3/4 tsp Kashmiri chilli powder 
1/2 tsp salt 
1/4 tsp turmeric 
1 large courgette or equivalent, chopped into chunky pieces 
2 tomatoes, finely diced 
1/4 cup freeze-dried peas*
1/2 cup coconut milk 
1 tsp dried fenugreek leaves 
 
Method:
  • Heat the oil in a saucepan and when it’s hot, add the mustard and cumin seeds
  • When the mustard starts to sputter, add the green chilli and cook for 30 seconds.
  • Add the chopped onions and ginger and cook for several minutes until the onions start to turn gold.    If you are using salted lime, (or lemon) add this now.
  • Lower the heat and add the garam masala, chilli powder, salt and turmeric.
  • Now add the tomato and courgette and fry for a few minutes, stirring from time to time.
  • Add the peas and the coconut milk and bring to the boil. Mix well and turn the heat low.
  •  Cook the courgette until its soft enough to suit your taste. 
  • Just before the curry is ready, add the fenugreek leaves and mix them in.
  • Taste and add more salt or garam masala if required.

Serve with rice, quinoa or flatbread.

Notes: 

  • *Freeze-dried ‟Surprise” peas are very useful to have on a boat.    Substitute with fresh or frozen if you have such a thing.  Or perhaps 1/2 cup cooked dried, green peas, which would make this recipe much more substantial.  Or maybe some diced carrot.
  • If you don’t have a green chilli leave it out (try to buy pickled ones, if you think you'll be making a lot of curry). 
  • Substitute 1/4 tsp cayenne or chilli flakes for the Kashmiri chilli powder.
  • Substitute 1/4 tsp fenugreek seeds if you don’t have the leaves; add them with the other spices.
  • Use less coconut milk, or leave it out for a dryer curry.

26 November 2023

Chana dal with courgettes


Serves: 2

 
Ingredients
 
1/2 cup chana dal
1 cup water
1/8 tsp ground turmeric
1 medium courgette, cut into half moons
1/4 tsp salt
1 tbsp oil
1/4 tsp cumin seeds
pinch asafoetida (omit if GF)
1/2 tsp garlic paste
1/2 tsp ginger paste
1 green chilli, minced
1 small onion, finely chopped
1 medium tomato, chopped

Method:

  • Put the chana dal in the pressure cooker, together with the water and turmeric, bring up to pressure and cook for 10 minutes. Reduce pressure naturally.
  • Once you can take the lid off, add the courgette and salt. If the dal is very dry, add a couple of tablespoons of water.
  • Put the cooker over a low flame and gently simmer the dal and courgette until the latter starts to soften. Keep an eye on it so that it doesn’t overcook – you still want a bit of texture in it. Add more water, if you think it needs it, but usually the courgette lets out a lot of moisture.
  • Now make the tempering. Put a small frying pan over a medium heat and add a glug of oil, or a scoop of coconut oil.
  • When the oil is hot, add the cumin seeds and let them sizzle for a few seconds. (If you’re not sure the oil is sufficiently hot, just put a few in the pan first.)
  • Now add the asafoetida and the onion - don’t let the asafoetida burn.
  • Cook for about a minute and then add the ginger, garlic and green chilli. Cook until the onion becomes translucent.
  • Now add the chopped tomato and cook for a further couple of minutes.
  • By now the courgette should have softened. Check the texture, taste to see there is sufficient salt and then pour in the tempering.
  • Mix it in and cook of a further 5 minutes.
Traditionally, this curry is served with roti or naan, but you can serve it with rice if you’d rather.

Notes:
  • If you can’t get chana dal, then yellow split peas will work fine. They may cook a little more quickly, so it’s probably worth letting the pressure off after 5 minutes and checking them.
  • Use 1 clove garlic, finely chopped instead of the paste
  • Use 1/2 tsp ginger, grated instead of paste.
  • Use a few cherry tomatoes, halved, instead of the chopped tomato.


28 August 2023

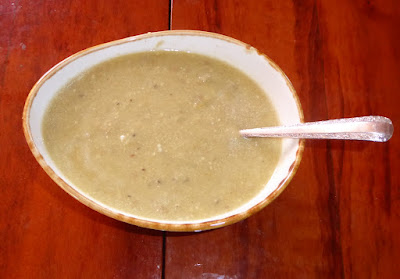
Leek and potato soup


This is a really good, hearty soup and completely different from its cousin Vichyssoise, which is served chilled. See in Variations. I think it needs plenty of potato to give it body. Some people like it puréed to a velouté, some people prefer it hearty and chunky. I prefer it half way between the two, but unless you go for totally puréed, you really to have to be sure that the potatoes are of a floury variety. Chunks of potato really don’t complement the smoothness of the leeks. I don’t peel the potatoes, but again that’s a personal choice. You can add milk of any type. Some people like to swirl in cream, at the end, but I would only want to do tat when having the soup as a starter. Sour cream is better – otherwise the result can be a bit cloying.

Use 1/3 seawater to 2/3 fresh, if the sea is clean, and leave out the salt.

Serves 4 for a starter, 2 for a main course

Ingredients

1 large or 3 small leeks
2 large tbsp butter or olive oil
salt
2 large, floury potatoes
4 cups mushroom stock, or water
1 cup milk
coarsely ground black pepper

Method:
  • Trim the discoloured top off the leek(s). If the leeks are very dirty, slit them in half or quarters from the top down towards to root end, and swirl around in plenty of water until clean. Otherwise, you will probably find the dirt is only in the lower part of the green leaves and the upper part of the white, in which case you can just slice that part out and wash it separately.
  • If you want to garnish the soup with crispy, fried leek tops (see Variations) cut off about 30 mm/1 inch of the green top, slice very thinly and set aside.
  • Now, take your clean leek and chop it.
  • Heat the butter/oil in your pressure cooker and add the leek. Sprinkle with about 1/4 tsp salt to help it soften and fry until the pieces are soft and silky in texture. If you wish, you can remove a couple of spoonfuls and set aside, to add at the end for additional texture.
  • Cut the potato into cubes, skin and all. Add to the pan and sauté for another couple of minutes, then add the stock or water. Bring up to pressure and cook for 3 to 5 minutes. Let the pressure reduce at room temperature.
  • Allow to cool slightly and then add the milk.  Mash, or purée to the required consistency. Season to taste: the saltiness will depend on whether you have used seawater and/or stock, and then grind over lots of black pepper and stir in the reserved leeks, if you’re using them.  Reheat until piping hot and serve.
For a full meal, serve with fresh bread.


Variations:
  • garnish with 4 tbsp sour cream
  • garnish with 4 tbsp chopped chives
  • garnish with crisp green leek tops, heat a frying pan, with a good glug of oil over a medium-high heat. Drop in a piece of leek, and when it bubbles and floats to the surface, add the rest and fry for a couple of minutes, until they go crisp but still maintain some of their colour. Remove with a slotted spoon
  • For Vichyssoise, which really needs to be served chilled, use half the potatoes and equal amounts of milk and water. When the soup is cooked, mash it or blend it smoothly – it’s supposed to be a velvety purée – and then chill it on ice or in a fridge, if you have such a thing. Serve with cream. This looks particularly attractive if it’s swirled on top of the soup.

21 August 2023

Pav Bhaji spice blend


Blender Alert


Pav Bhaji is a popular Indian street food and is usually made in huge pans. Pav means “a small bun,” while bhaji means “vegetable.” The spice blend used to make the vegetable stew is different from the usual garam masala (or curry powder!) and has sour and sweet notes. The black peppercorns add a background heat, and the other spices add glorious scent and flavours to the blend. It can be used on any vegetable side dish or you could experiment with adding it to vegetable curry.

Makes about 1/4 cup 

Ingredients

4 tsp coriander seeds

1 tsp cumin seeds
1 tsp fennel seeds
4 whole black cardamoms or use whole green cardamoms
4 cloves
1/2 to 3/4 tsp chilli flakes
1/2 tsp black peppercorns
1 tsp ground cinnamon (not cassia)
3 tsp dry mango powder/amchar

Method: 

  • Heat a large skillet over medium heat. 
  • Add coriander, cumin, fennel, cardamoms, cloves, chill flakes and peppercorns and dry roast for a couple of minutes, until the coriander and fennel seeds start to change colour.  Cool slightly and transfer to a spice grinder.
  • Add the cinnamon and mango powder and grind the ingredients to a powder.  Transfer to an airtight container and store in the proverbial cool, dark space.  A glass jar is better for blended spices.
 

16 August 2023

Chilli sin carne


This is one of the first recipes I ever cooked and it was pretty exotic for an English girl in the mid 70s!  The photo above, shows it served with kumara/sweet potatoes: I'd never heard of either back then!  Nowadays, in one form or another, it’s a standard for both omnivores and vegetarians. People make all sort of punning and witty names for the vegetarian version, but surely chilli sin carne is the obvious version - chilli without meat!  I have tweaked the recipe over the years and now have something that everyone seems to really enjoy. Full of flavour, with a nice lift of chilli, warming and filling, it is wonderfully welcome on a cold, damp evening. Moreover this recipe is one that can be cooked in just about any conditions at sea – and I have done so. You can eat it with bread, rice, pasta, polenta, potatoes sweet or otherwise and no doubt many other things.  


With fried yams


If you aren’t used to ‛spicy’ foods, ie, chilli, you might want to go easy on the chilli flakes. If you like more spice, swop out the flakes for cayenne pepper.

Everyone, I’m sure, has their own version of this dish and mine is less authentic than most. The bulgur wheat makes a fine substitute for mince, while keeping the dish looking similar. I add some cocoa, which darkens the sauce and adds what I fondly believe to be ‘that South American touch’. In defence of my creation, I will say that everyone seems to enjoy it.

Serves 2

Ingredients

1/2 cup red kidney beans, soaked in 1½ cups water
1/4 cup bulgur wheat
1 tbsp soya sauce
1 tsp cocoa
1 onion, chopped
2 garlic cloves, diced
2 tbsp olive oil
1/2 green pepper
1/2 tsp chilli flakes
1/2 tsp ground cumin
1/2 tsp smoked paprika
1/2 tsp oregano
400 g/14 oz can chopped tomatoes, OR 3 fresh tomatoes OR 4 tbsp tomato purée
salt and pepper
 
Method:
  • Put the soaked kidney beans and their water in a pressure cooker, together with the bulgur wheat, soya sauce and cocoa. 
  • Bring to pressure and cook as usual.
  • Meanwhile, heat the olive oil in another saucepan, add the onion and garlic and fry for about 5 minutes until they’re softened.
  • Chop and add the green pepper, lower the heat and cook for a few more minutes. Add the chilli flakes, cumin, smoked paprika and oregano and stir until they are well mixed in.
  • Stir in the tomatoes and lower the heat. If you're using tomato purée add and extra ¼ cup of water.  Bring to the boil and then simmer over a low heat.
  • When the beans are cooked, add them to the saucepan. Stir gently to combine and season carefully with salt and a generous grind of pepper.
  • Simmer until the sauce has thickened to the consistency you want and the flavours have have combined – at least ten minutes.

Serve hot.  I like chilli best, served over ‛baked’ (ie, cooked whole in the pressure cooker) and split kumara (sweet potatoes). But it also goes well with bread, rice, pasta, polenta and quinoa. I have never tried it with potatoes, but am sure it would go well with them in just about any form.

Note:
  • Chilli is one of those meals that improves with keeping, so you can make it earlier in the day if you feel like it, or if you’re making it for company. Re-heat it very gently to prevent it burning and add a little more water if necessary.


With polenta
 Variations: 

  • In rough conditions, fry the vegetables in the pressure cooker, add the kidney beans, the water, bulgur wheat, soya sauce, cocoa, oregano and spices, cover and bring up to pressure. Let the pressure reduce gradually while cooking pasta in another pan. Add the tomatoes and seasoning after the pressure has reduced.
  • In really rough conditions, Just dump everything into the pressure cooker, along with a further cup of water and 1/2 cup rice. Bring up to pressure and cook for 10 to 15 minutes. Reduce pressure naturally.
  • As an alternative to using rice, dump all the chilli ingredients into the pressure cooker, stir well to mix them all together and then put some kumara (sweet potatoes) on top. If they are small ones, you will need to handle them with care because they will be very soft after all that cooking, but still delicious.
  • You can substitute TVP for the bulgur wheat. If you do, fry it with the onions and garlic and add some extra water when you tip in the beans./Substitute 1/4 cup whole lentils for the bulgur wheat.
  • If you're making 4 servings, the one can of tomatoes will suffice. You may need to add more water to stop the sauce getting too thick.
  • Use red pepper if you don’t have green.
  • This also works well with black beans.
  • Leftovers can be used to fill empanadas.

15 August 2023

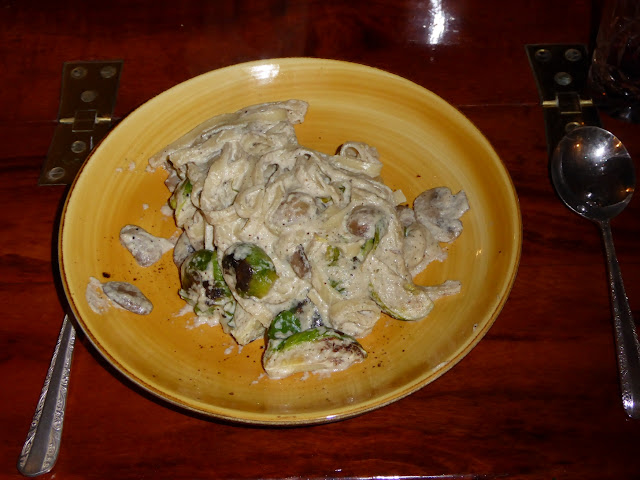
Mushrooms and Brussels sprouts with creamy hemp sauce


Blender Alert
I love Brussels sprouts and it always seems a bit of a shame to use them as an addition on the side rather than star of the show. They go very well with mushrooms and mixed with this thick hemp sauce, shine in a really good combination to go with pasta.

Hemp seeds, aka hemp hearts
Hemp seeds, also known as hemp hearts, are one of the latest wonder foods, but I particularly like them for making vegan milk and a cream for cooking, because there’s no need to soak them first. Hemp is also a very low-impact crop to grow, requiring little water and no fertiliser; it doesn’t have to be grown in the tropics and processing the seeds doesn’t mean (generally) women are using caustic chemicals, often with inadequate protection, so we should certainly use it in preference to cashew nuts. To serve, linguine, or fettuccine are my choice.

Unfortunately, you really do need a blender or this sauce, although, of course, you could take the concept and use some other form of cream.

Serves 2

Ingredients

olive oil
2 cloves garlic, minced
1/2 medium onion, diced
200 ml water
1/2 cup hemp seeds
1/2 tsp mushroom stock powder
2 tbsp nutritional yeast
1/4 tsp salt
generous grind black pepper
2 cups Brussels sprouts, trimmed and halved
6 or 8 button mushrooms, thickly sliced
fettucine or linguine – about 25mm/1” dia. stacked on end
Parmesan cheese to serve

Method
  • Heat some olive oil in a saucepan over a medium heat. Add the garlic and onion and cook for a couple of minutes, until the onions become translucent. Remove from heat.
  • Now add the cooked onion and garlic to a blender, together with the water, hemp hearts, stock powder (if using), nutritional yeast, salt and pepper. Blend for a minute or so to make a smooth and creamy sauce. Taste and adjust seasonings.
  • Put some more oil in the saucepan, and add the Brussels sprouts and cook for a few minutes, until they start to brown on the edges.
  • Meanwhile, add water to another saucepan and bring to the boil for the pasta. When it’s boiling, cook the pasta as usual.
  • Now add the mushrooms to the sprouts and fry for a few more minutes, stirring frequently, until they are browned. A pinch of salt might help here.
  • Lower the heat and add the prepared sauce to the vegetables and stir to combine. Gently cook the sauce until it’s thick. When the pasta is cooked, add it to the pan, saving the pasta water, into a jug. Use some of this water to rinse out the blender and add to the pan.
  • Cook the sauce a little longer: if it seems too thick, add more of the pasta water.

Serve immediately with extra hemp seeds and/or Parmesan or vegan "Parmesan" cheese.

Notes:
  • The pasta sauce will thicken quickly once heated. Keep a close eye on it. If it is too thick, add extra pasta water to loosen it up.

Variations:
  • You could use other vegetables, such as asparagus, green beans, mange-tout peas, etc instead of the Brussels sprouts. But the latter are particularly good!

  • One alternative I would recommend is broccoli, but cut it into very small florets, the same size as half a sprout, otherwise the sauce won’t coat everything evenly.
  • Substitute dried mushrooms for fresh, if these are unavailable.


12 August 2023

Pasta with chickpeas and vegetables in tahini sauce


I have just suggested 'Pasta' for his recipe, because it will really go with just about any short pasta.  Indeed, if you make more sauce, it would also successfully coat a longer type of pasta.  While I've suggested specific vegetables, this is essentially a meal that can be made using ingredients you’d have in your lockers, with whatever vegetables you have to hand. There is, however, one proviso to this: I suggest sprinkling black sesame seeds over the meal when it’s served: white sesame seeds can be used as a substitute, but the black ones look and taste great!
 
Serves 2
 
Ingredients
1/2 cup of chickpeas, soaked and cooked
olive oil
1 onion, chopped
2 cloves garlic, minced
about 4 button mushrooms, sliced
1/2 red pepper, chopped
1/4 tsp salt
1/4 tsp chilli flakes, or to taste
about 6 florets from a head of broccoli
4 handfuls of pasta, such as fusilli
2 tbsp tahini
reserved water from the pasta
salt and pepper
1 tbsp black sesame seeds
 
Method:
  • Cook the chickpeas in the usual way and set aside.
  • Add olive oil to a large saucepan over a moderately high heat.
  • Add the onions and garlic and cook for a few minutes until the onions are softening, stirring frequently to ensure nothing burns.
  • Add the mushroom and red pepper and sprinkle with salt, stir into the onions and garlic and cook for a few minutes until there is some colour on both the onions and red peppers, then lower the heat. Add in the chilli flakes, stir well and cover. Leave over a low heat while you cook the pasta.
  • Bring salted water to boil in a saucepan and throw in the pasta. Stir well to ensure that it doesn’t stick together. Bring back to the boil, cover and lower the heat so that it doesn’t boil over. Set the timer for 5 minutes
  • When the timer rings, add the broccoli florets and cook until both pasta and broccoli are just not soft. If you like crunchy broccoli, wait a bit longer before adding it.
  • While this is cooking, put the tahini into a small, together with generous amounts of salt and pepper. When the pasta and broccoli are done, remove them from the water, using a slotted spoon, or drain the water into a jug, and add them to the vegetables.
  • Add a tablespoonful or so of pasta water to the tahini and mix to a smooth consistency. Tahini varies tremendously in how thick it is, but you want to end up with a sauce that pours easily and will coat the pasta and vegetables. Mix with a butter knife or mini whisk until it becomes a creamy colour, then add to the pan.
  • Stir gently until everything is mixed and serve.
Garnish with a generous amount of black sesame seeds.
 
Note:
  • If you have no black sesame seeds, substitute with white.
  • I'm not sure the pasta water has the same effect when used with gluten-free pasta, but it can't do any harm!
Variations: 
  • Use white beans instead of chickpeas.
  • Replace the broccoli with cauliflower florets.
  • For a voyaging variation, use chopped cabbage.
  • Add green beans or asparagus with or instead of some of the other vegetables.
  • Replace the red pepper with carrot.
  • Add a couple of tbsp of freeze-dried peas with or instead of some of the vegetables.
  • Use bulgur wheatinstead of pasta. In this case you will have to cook the broccoli separately.
  • Add chopped fresh herbs, if you have some.

11 August 2023

Voyagers' pasta

In a cool, damp place, or when, as is usually the situation on a boat, you’re watching your water consumption, the conventional way of cooking pasta is far from satisfactory.  The instruction tell you to fill a large saucepan with water, bring it to a full rolling boil, plunge in the pasta and boil it, uncovered for the apppropriate length of time.  In anywhere that isn't actually hot, with all the hatches open, this method steams up the boat and in any situation, it uses far too much water. I have two ways of cooking pasta, which both yield very acceptable results without resulting in a steamed-up boat or using excessive amounts of water.
 
Even North American cookbooks bottle out and resort to ounce measures when including recipes for pasta, because it's usually fiendishly difficult to guess how much to make.  a thrifty voyager doesn't not want to waste pasta and it's one of the least useful leftovers unless you happen to have a passion for pasta salad.  Of course, if you have a new pack, you can work out that you need a quarter, or whatever, for 2 servings, but many voyagers – and I am one of them – decant their pasta into large, plastic containers to save them from weevls.  Moreover, once you've taken out the first serving, it becomes more and more difficult to divide up what's left, let alone remember how many servings have already been removed. I am therefore assuming this is the situation and as we can’t use scales underway, I am giving my measurements by the handful. I generally use about 4 handfuls of pasta for 2 people, assuming a generous amount of sauce, because this is a main course, rather than the smaller amounts used more to flavour the pasta, of traditional Italian cuisine.  I have small hands, but after experimenting, I reckoned that a handful is about the equivalent of a cup. Of course, this only works for small pasta, but if you follow the same plan, I’m sure you’ll soon work out what is appropriate for you.  I'm afraid it will be a matter of trial and error.  With spaghetti, or linguine: pull it out of the container and make a column of pasta with a diameter of about 25 mm (1 in). this seems to be about right for two.  You can actually get sticks with holes in them for measuring long pasta, and they're very good.  I've had two in my time, but both got thrown overboard (not by me!).  I generally use Method 1, but Method 2 is useful when preventing the cabin from steaming up is really important.

 VOYAGERS’ PASTA
 
Serves 2 

3 cups water + 1/2 tsp salt OR 2 cups fresh water, 1 cup seawater
4 handsful pasta OR 25 mm (1 in) column spaghetti, etc
1 tbsp olive oil

Method 1
  • Heat water to boiling point.
  • When the water is boiling rapidly, add the pasta and stir several times to separate the pieces from one another. If you are using long pasta, plunge one end in the water and then gently press down the other end until it’s all in the water. Then stir vigorously so that it all separates.
  • Cover and turn down the heat so that the pan doesn’t boil over – it needs to be very low and often you need to move the lid slightly to let excess steam escape. Cook for +/- 10 minutes until the pasta is the texture you like. The only way to check this is by sampling a piece. A pasta spoon (the type with spikes) or kitchen tongs are ideal for this.
  • Drain and serve with butter or olive oil and plenty of coarsely-ground black pepper.
Method 2 uses a pressure cooker and although unconventional, keeps steam to a minimum.
  • Heat water to boiling point. Add olive oil or a knob of butter to help prevent the pasta from frothing up and boiling over.  This will mean that the sauce won't cling to the spaghetti as well as you'd like, but it will stop the vent from getting clogged.
  • When the water is boiling, add the pasta and stir several times to separate the pieces from one another. If you are using long pasta, plunge one end in the water and then gently press down the other end until it’s all in the water. Then stir vigorously so that it all separates.
  • Put on the lid and clamp it; keep the heat fairly high until the cooker comes up to pressure.
  • Lower the heat and cook for no more than 3 minutes - you may need some trial and error with this, depending on how hot your flame is, how big the pressure cooker and at what pressure it cooks.
  • Remove the pressure cooker from the heat and let the pressure reduce gradually – if you de-pressurise rapidly, the pasta collapses. The pasta will cook perfectly with this method.
  • Drain and serve with butter or olive oil and plenty of coarsely-ground black pepper.
Notes:
  • If you’re cooking for more than 2 people, keep a careful eye on things when you close the lid, to ensure that the liquid doesn’t froth up into the vent. This is unlikely to happen unless the pressure cooker is more than half full and you forgot the oil. 
  • If you’re very concerned about condensation, lift the pasta from the pressure cooker with a pasta spoon or tongs, rather than tipping it through a colander, which always produces clouds of steam.
Oddly enough, I had only just finished writing this post when I came across an article on the Guardian website about cooking pasta.  It bore out my method!  https://www.theguardian.com/food/2023/jun/28/10-food-rules-you-should-ignore-felicity-cloake

Mushroom Strogonoff, with lentils and pasta

Even ‛traditional’, meat-based strogonoff seems to vary considerably. In USA, it’s usually swamped with sour cream (which is generally both thickened and soured artificially); in Europe they are more likely to stir a couple of tablespoonfuls of crème frâiche into the sauce. They also include a little tomato purée and Dijon mustard is essential: although mushrooms and onions weren’t included in the original recipe, mustard most certainly was. Neither tomato purée nor mustard is generally mentioned in USAnian recipes. A little white wine or brandy can be added for special occasions.

Apparently allspice was in the original recipe. I also include paprika for its earthiness, which I really like.

Many vegan versions of this don’t use a ‛meat’ equivalent at all, so couldn’t really be much further from the original. I like the combination of textures of either seitan or lentils with the mushrooms and I cook this meal in two different ways. The seitan looks more like the original, the lentils are quicker to prepare. I decided to put them as two separate posts, because they need slightly different cooking and also, different pans.

Serves 2

Ingredients

olive oil
4 or 5 medium/2 cups sliced button mushrooms *
1 small OR 1/2 onion finely chopped or sliced
1/2 cup whole lentils
1 cup water
1 tbsp flour
1/4 cup brandy or white wine
1/4 cup mushroom stock or water
salt and black pepper to taste
1/2 tsp ground allspice
1 tsp paprika
1 tsp Dijon or brown mustard
2 tsp tomato paste
1 tbsp (vegan) crème fraîche

Method:
  • Heat some olive oil in a pressure cooker, over a medium-high heat and add the sliced mushrooms. Cook them for about 5 minutes. Remove them from the pan and set aside.
  • Add some more olive oil and when it’s hot, add the onions. Cook until just turning translucent but not browned.
  • Add the lentils and stir around with the onions for a minute or so, pour in a cup of water, put on the lid and bring up to pressure. Cook for 10 minutes and let the pressure come down gradually.
  • Put the pan back over the heat, remove the lid, sprinkle on a little flour and stir to coat everything and cook off some of the raw flour taste.
  • Add the brandy or (far more likely!) wine to the pan.
  • Stir in the mushroom stock or water, salt and black pepper, allspice, paprika, mustard and tomato purée. Mix well and simmer gently for about 10 minutes so that the flavours combine.
  • Stir in the crème fraîche and the reserved mushrooms, and cook for a few more minutes. Don’t let it boil.
Serve with pasta, mashed potatoes, fried potato wedges or whatever takes your fancy. (I like either fettuccine or smashed potatoes.

Notes: 
  • *If you have lots of mushrooms, or they’re cheap, feel free to use a lot more! Other varieties would be as good, not better, than button mushrooms.
  •  Instead of crème fraîche, use yoghurt, or vegan cream plus 1/2 tsp lemon juice or vinegar.
 

05 August 2023

Chickpeas and fusilli in tomato sauce


This is an old favourite of mine. Incredibly simple to make, but astonishingly good to eat. Moreover, this is perfect voyaging food, because it is made from ingredients that you will have in your lockers. I prefer it with fusilli – spirals – but of course it will go with whatever pasta you have on board.

Serves 2

Ingredients

1/2 cup of chickpeas, soaked and cooked
a good glug of olive oil
1 onion, finely chopped
2 cloves of garlic, crushed or diced
425 g/14 oz can of tomatoes (See Notes)
a little wine
about a dozen black olives
1 tsp capers
up to 1/4 tsp chilli flakes
salt and pepper
4 handfuls of fusilli

Method:
  • Cook the chickpeas as usual.
  • Pour the olive oil into a large saucepan over a medium heat. Add the onion and cook until softened and translucent. Add a little salt to speed things up, if you want.
  • When the onion is almost cooked, add the garlic and cook until it’s soft.
  • Now add the tomatoes and rinse out the can with wine, if you’re using it. If you’re using whole tomatoes, break them up with your spoon.
  • If you’re using them, stone and halve the olives. Add the drained capers.
  • Season with herbs andchilli flakes - which give a nice lift - and a generous amount of black pepper. Taste and add salt if it can take it.
  • Bring to the boil and add the chickpeas.
  • Lower the heat and cook until the sauce has become quite thick.
  • When the sauce is almost ready, cook the fusilli until it reaches the consistency you like.
  • Remove it from the cooking water with a slotted spoon, or drain it into a jug (you may need some of the water to thin down the sauce) and add it to the other pan. Cook for a few minutes longer. Check the seasoning and serve.
Add Parmesan (vegan, if you prefer) at the table, if you like it.

Notes:
  • Ideally, use chopped tomatoes in purée, but if you don’t have those, any others will do. It’s worth using better quality tomatoes in this recipe (most recipes for that matter!) for the extra flavour. They seem to be less watery, too.
  • Substitute dried, cooked chickpeas with a can
Variation
  • Use cannellini or butter beans.
  • Add finely diced celery if you have some.
  • Try this with pasta shells, or similar. You want a pasta that will hold the sauce.

27 June 2023

Peanut Chutney

 Blender alert

This isn’t what most Westerners would think of as a chutney. To us it is more of a pâté or a spread. However, it tastes surprisingly good and goes very well with lentil flatbreads. However, it’s also very acceptable as part of a ‛charcutérie’ board with bread or crackers. The tempering adds an exotic touch, but isn’t essential, especially if there are other dips and pâtés on the board.


Ingredients

1½ tsp oil
1 to 2 green chillies or dried red chillies, to taste
1½ tbsp urad dal or chana dal
1/2 cup raw peanuts, OR roasted peanuts
1/2 tsp cumin seeds
1/4 tsp of garlic OR ginger paste
1/4 tsp salt
1/2 to 3/4 cup water
1/2 tsp tamarind paste

Tempering (optional)

1 tsp oil
1/4 tsp black mustard seeds
1/4 tsp chilli flakes
1/4 tsp crushed garlic
1 pinch asafoetida/hing (omit for GF)

Method:
  • Heat 1 tsp oil in a pan. Fry chillies and dal until the dal turns golden.
  • Remove and set aside.
  • Add peanuts and fry over a medium flame until golden and aromatic.
  • Add cumin to the hot peanuts. Keep aside to cool.
  • Transfer all these to a blender along with garlic/ginger, salt and 1/2 to 3/4 cup water.
  • If your are using it, add the tamarind paste.
  • Blend until it’s smooth.
  • Taste and add more salt and chilli if required.
Tempering (optional)
  • Add 1 teaspoon oil to the hot pan.
  • Next add mustard, red chilli and garlic. Fry until fragrant.
  • Lastly add hing.
  • Turn off the heat and pour the tempering over the chutney.
Serve peanut chutney with bread, crackers or lentil flatbreads.

Notes:
  • If you are using roasted and salted peanuts, don’t add any more salt until you’ve mixed and tasted the chutney.
  • You can dry roast the peanuts without oil.
  • Traditionally, the peanuts are dry roasted first and then the skin removed. In this case, brown the skin as well as the nut to bring out the full flavour. A compromise is to use blanched peanuts and roast them yourself. They will add a better flavour to the chutney.

Carrot chutney

Blender Alert

This is another Indian chutney, that most of us would not recognise as such, and while it may sound unpromising, it’s very good. Like the peanut chutney, it also makes a very useful spread or dip, particularly with lentil flatbreads. The tempering adds a bit more spice and an interesting appearance. If you’re serving it with bread, or crackers, along with other ‛charcuterie’, you might prefer it without. It will still be both an unusual and pleasant addition.

Makes a good cupful

1 tbsp (coconut) oil (divided) 

2 tsp chana dal OR roasted peanuts
1 tsp urad dal OR sesame seeds
2 dried red chillies (adjust to taste)
1/2 garlic paste
1/2 tsp ginger paste
1 green chilli (adjust to taste)
1/2 tsp cumin seeds
1 cup carrots (chopped, 200 grams)
1/2 tsp salt
1/8 tsp turmeric
1 to 2 tsp lemon juice OR tamarind paste

Optional Tempering

1 tsp (coconut) oil
1/4 tsp mustard seeds
1/2 tsp cumin seeds
1/4 tsp chilli flakes
1/4 tsp garlic paste
1 pinch hing (asafoetida)

Method
  • Pour 1 teaspoon oil to a hot pan. Add chana dal, urad dal and red chillies to the hot oil and fry until the dal turns light golden.
  • Add garlic, ginger and green chillies. Fry until the dal turns deep golden to light brown. Add cumin seeds, stir and remove all of the fried ingredients to a plate.
  • To the same pan, pour 2 teaspoons oil. Add carrots, salt and turmeric. Stir fry on a medium high heat for 3 to 4 minutes until fragrant. Covered and cook for 2 to 3 minutes or until tender. Turn off the heat and cool.
  • Add the cooled dal, ginger, garlic, chillies and cumin to a blender and make a slightly coarse powder.
  • Add the cooked carrots and tamarind paste/lemon juice. Pour in 1/4 cup water. Blend to a smooth or coarse chutney to suit your liking, scraping the sides as you go.
  • Taste and add more salt if you think it needs it.
  • Adjust the consistency to suit with more water, if you want to.

To temper (optional)
  • Heat oil in a pan. Add the mustard seeds, cumin seeds, chilli flakes and garlic paste. Fry until the cumin seeds have changed colour and the spices smell fragrant. Add hing and turn off.
  • Pour the tempering over the carrot chutney.
Notes:
  • Leave out the hing for GF.
  • Chana dal and urad dal are added for flavour and taste. However, for a change, you can use roasted, skinned peanuts and white sesame seeds. Both work well but the chutney tastes different. Most of us have salted peanuts on board and these can be used, but in that case, add the salt after you’ve blended the chutney so as not to over-salt it.
  • You could make this without a blender, if you used peanuts and sesame seeds and either chopped the peanuts, or ground both in a Mouli. The other ingredients would need to be cooked until they were very soft and you might want to use a little cayenne pepper and ground cumin instead of the whole spices. This would end up a little more chunky, but none the worse for that.
  • Use young juicy carrots and not old, tough ones. If they need peeling, rather than scrubbing, they won’t go well in this chutney. 
  • Ginger and garlic: I love both, but you can skip one of them if you prefer. The chutney is quite delicately flavoured, so follow the recipe and don’t use too much.
  • Chillies: Dried chillies add pungent flavours and heat while the fresh green chillies add heat. You can use one or the other, if you prefer. I use green chillies in brine due to the insane expense of fresh ones (in New Zealand).