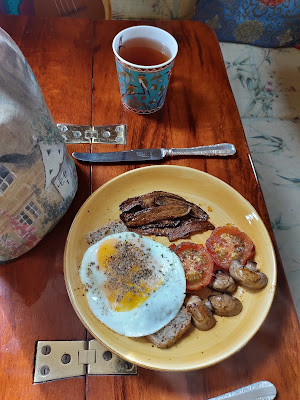
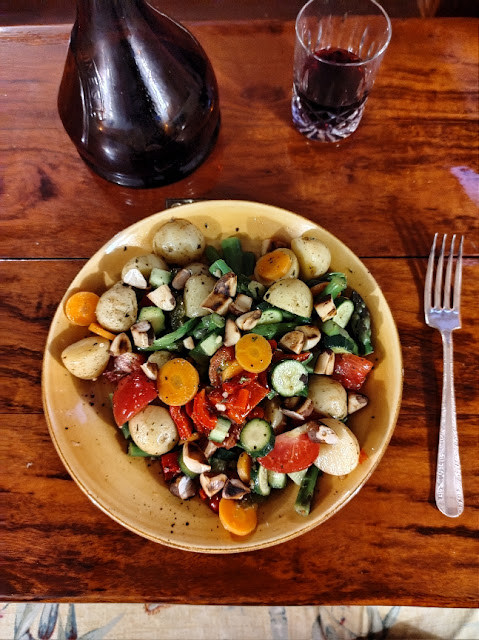
About Me

My photo
Back in the 80s, I wrote a book called "Voyaging on a Small Income", which was published and sold astonishingly well. It’s become almost a “classic” and is probably why you’ve found this site! I’ve been living aboard and sailing since the 70s. Nine different boats have been home, sometimes for several months, sometimes for many years. I love the way of life, the small footprint and being close to Nature. I’m a great fan of junk rig and having extensive experience with both gaff and bermudian rig, I wouldn’t have any other sail on my boat. It’s ideal as a voyaging rig, but also perfect for the coastal sailing that I now do. I’d rather stay in New Zealand, not having to keep saying goodbye to friends, than go voyaging, these days. Between 2015 and 2021, I built the 26ft "FanShi", the boat I now call home. For the last 45 years or so, my diet of choice has been vegetarian and is now almost vegan. I love cooking and particularly enjoy having only myself to please. I am combining all these interests (apart, perhaps, from junk rig!) in this blog. I hope you enjoy it. I also have other blogs: www.anniehill.blogspot.com and http://fanshiwanderingandwondering.wordpress.com

24 October 2022

Muesli

Most people eat a cold breakfast. I’m not fond of commercial breakfast cereals: they’re either sweet or tasteless, are bulky and expensive and usually not particularly nutritious. Muesli – preferably home-made – is a much better bet.

Oats are one of the darlings of the Healthy Eaters at the moment: Folic acid, complex carbohydrates, good for blood pressure – the whole nine yards. In addition to oats in your muesli, are all the other goodies, which are delicious and Good For You and ideally include apricots, pumpkin seeds, prunes, Brazil nuts (for selenium) raisins and dates, all of which give you quantities of essential vitamins and minerals as well as tasting wonderful. A quarter cup serving of my muesli, together with milk and/or yoghurt will give you a superbly nutritious breakfast, which is filling and will keep you going until lunch time, without wanting a snack.

The recipe below makes enough muesli to fill a 3 l (3 qt) container – 48 single servings, 24 if you like a hearty breakfast. As it’s a bit of a schlep to make, it’s worth doing in quantity. Before buying dried fruit, ensure that they’re pitted; health food versions often are not. They’re a nuisance to do yourself and a hazard to teeth if left in. I prefer seedless raisins, too.

Incidentally, I find scissors the best for chopping the fruit and nuts. This makes a rich and filling muesli: some people might prefer a higher ratio of grains to fruit and nuts. Vary the latter according to cost and availability.

Ingredients

 
about 6 cups jumbo oats, for Gluten Free
OR a mixture of oats, rye and barley flakes
1/2 cup pumpkin seeds
1/2 cup sunflower seeds
1/2 cup Brazil nuts
1/2 cup mixed hazelnuts, walnuts and almonds
1 cup raisins and/or sultanas
25 dates
20 dried apricots
12 prunes
 
Method:
  • Half fill the container with the oats or mixed flakes.
  • Add the pumpkin seeds, sunflower seeds and raisins. Mix everything together.
  • Halve the nuts, add and mix.
  • Chop the dates, add and mix.
  • Chop the apricots, add and mix.
  • Chop the prunes, add and mix.
  • Top up the container with oats/flakes and mix one more time.
Variations:
  • Muesli is very good with hot milk in cold weather.
  • Top with slices of fresh fruit – nectarines, raspberries and strawberries are particularly good.
  • In colder weather, I like to heat some fruit to put over the muesli. Squeeze a large orange into a small pan, add sliced banana and scoop out the contents of a kiwi fruit or persimmon or anything else you can lay hands on.
  • Serve with thick yoghurt. I like a quarter cup of muesli mixed with a good dollop of yoghurt and no milk.
  • Use any other nuts or dried fruits that take your fancy. Add desiccated coconut, too.
  • Use fruit juice instead of milk.
  • You can also put your muesli into a pan with milk or water and cook it like porridge (see recipe).

Porridge

I rather like porridge, with a dribble of honey and a spoonful of mixed seeds sprinkled over it. I truly enjoy real porridge: made with oatmeal, as the Scots know it – but am not so fond of that made with rolled oats. Oatmeal seems to be unavailable in a number of places: it looks like cream-coloured, coarsely ground corn and is sometimes described as ‛steel-cut’: if you can get it, try it instead of the rolled oats in the following recipe. Why it’s not used more frequently and is not more generally available, I don’t know, because it is more compact, cooks more quickly, produces a smoother result and tastes better than rolled oats.

Quick-cooking oats do not have the flavour and texture of jumbo oats. If you’re eating porridge simply as belly timber, use the quick oats; if you enjoy it, use traditional, slow-cooking oats.

Serves 2

cup oatmeal OR 1 cup rolled oats

2 cups water

pinch of salt


  • Put the ingredients into a small saucepan and mix.

  • Bring to the boil, stirring constantly.

  • Turn down the heat as low as possible and cook, very gently, for about three minutes (more like ten for jumbo oats). Whatever you do, don’t burn it. It will taste dreadful if you do.

  • Pour into bowls and eat immediately, with some milk and either salt (for the purists) or brown sugar (for most other people).

Variations:

  • Try treacle, golden syrup (my dad’s choice), honey or dulce de leche (see recipe) to sweeten it.

  • Use cream rather than milk. Who would have thought that porridge could be luxurious? (Yoghurt and porridge do not go together, in my opinion.)

  • Add 1/4 cup of raisins with the oats.

  • Use 50/50 milk and water to cook it. This makes a much richer version.

  • Of course, substitute 2/3 cup of seawater for the fresh.

  • Serve with sliced, fresh fruit.


Toast - and how to make a stove-top toaster


Toast is always popular at breakfast, but not everyone has a grill. You can make acceptable toast by simply heating a good-quality frying pan and toasting the bread on both sides, but it's not as good as that made with an open flame.  You can, however, make excellent toast on top of the cooker using a specially-made toaster. There are many so-called toasters fobbed up on the unwitting public by sadistic manufacturers. They’re apparently designed so that you can cook four slices at a time. In fact, they’re usually too small to take more than one piece of bread at a time and all they do to that, is to make it vaguely warm and slowly dry it out. In a word, they’re useless. The best way to toast a slice of bread quickly is to support it horizontally over the flame.

Camping toasters that work, do exist and are easy to buy in Oz and NZ. Unfortunately, the wire mesh is far too thin and soon burns out. 


Your best bet is to copy the style, but make it yourself. To make a toaster, what you need is some fine stainless steel mesh and some 3 mm (1/8 in) brass wire. Cut the mesh 175 mm (7 in) square. Make a wire framework about 150 mm (6 in) square, with a leg at each corner. The legs need to be about 40 mm (1½ in) high and are fabricated by bending the brass at right angles and then back along itself, thus creating a loop. Cut the corners of the mesh and wrap it over the framework you have just made, leaving a 10 mm (1/2 in) overlap, which you squeeze flat with pliers. Now take some more brass wire and thread it through the legs so that you create another 150 mm (6 in) frame. Cross it with two or three more lengths of wire. You may need to heat the brass to get it to bend and it’s probably easier to seize the cross wires on with some thin wire rather than trying to bend the brass wire. The result may not be particularly elegant, but never mind. A final refinement is to take another length of brass wire and form it into a handle.

To use the toaster, simply put it mesh side down over the flame and put your bread on the wire rack. It can also be used for poppadums, which will cook perfectly and very quickly this way and I also use mine for roasting aubergines, for Mock Caviare, and peppers (see recipes).

WHAT TO PUT ON TOAST FOR BREAKFAST

Well, there are heaps of things to choose from and they also vary from culture to culture. Sticking to the more usual spreads:

  • Just butter

  • Marmalade
  • Jam/jelly/conserve/preserve
  • Peanut/sunflower/nut butter or tahini
  • Honey
  • Marmite/Vegemite/yeast extract
  • Hummus
  • Lemon curd
  • Dulce de leche (for those with a really sweet tooth) (see recipe)
  • Mashed bananas
Or any of these in combination: for example I love peanut butter and Marmite; a friend enjoys tahini and honey; and USAnians apparently combine peanut butter and jelly.

Things like cream cheese are also appealing, but generally require either eating every day or refrigeration.

A really wonderful spread is Pic's Big Mix. I’m not sure if it’s available outside New Zealand (yet. His peanut butter, some of the best I have ever eaten, is now being exported to many countries).  So I have made up a recipe you can make yourself.  Pic's business, by the way, is one of the few B Corp outfits in New Zealand: another reason for buying his peanut butter.

Annie's Big Mix


A really wonderful spread is Pic's Big Mix. I’m not sure if it’s available outside New Zealand (yet. His peanut butter, some of the best I have ever eaten, is now being exported to many countries), so I’ve shamelessly copied the recipe (although I’ve substituted flax seeds for Chia seeds). This is substantial and delicious; I find it hard to resist simply scooping spoonfuls straight out of the jar! It is stretching the concept to call it a spread, I admit, because of the huge percentage of seeds it contains.

  ANNIE'S BIG MIX


2/3 cup peanut butter

2 tbsp pumpkin seeds, roasted

2 tbsp sunflower seeds, roasted

1 tbsp hemp seeds

1 tbsp sesame seed

1 tbsp flax seeds

salt to taste


  • Roast the pumpkin and sunflower seeds in a frying pan, with no oil, until crisp.

  • Add to a 250 ml jar with the other seeds and salt. Shake to mix

  • Top up with peanut butter - or tahini.

  • Mix well.


Boiled eggs


I don’t wish to seem condescending, but actually, not everyone does know how to boil an egg and one or two points may be pertinent for sailors.

1 or 2 eggs per person

1½ cups water

  • Bring the water to the boil. Seawater works just fine and seems to make no difference to the timing. It also has the advantage that if the egg is cracked, it will instantly set the white so that it doesn’t escape all over the place. With the tine of a fork or a sail needle, pierce a hole in the wide end of the egg. This will help prevent it from cracking, particularly in cold conditions.

  • Carefully lower in the egg and cook for 4 minutes if you like a soft white, 6 minutes if you like the white firm and the yolk still slightly runny. These times assume a large egg. If you like your egg hard boiled, put it in the pan with the cold water.

  • Remove from the pan as soon as the time is up and serve immediately, with bread, crackers or toast.

NOTES

If you are using fresh water and in spite of your making a hole in the end of the egg, it still cracks, immediately add a tsp salt, or a couple of tsp vinegar or lemon juice to the water. This should stop the white from leaking out into the water. In very rough conditions, it’s worth doing this as a precaution, anyway.

Scrambled eggs

Experienced cooks will not need to learn how to cook these, but may find the prefatory remarks of interest. Scrambled eggs, as we all know, stick better than epoxy and most galleys simply do not have the room for a small, non-stick saucepan dedicated solely to the scrambling of eggs. A good alternative is to use your wok, if you have such a thing. I have a small enamelled pan that I regularly use for popcorn and that works like a charm, too. The new-style, hard-anodised, cast aluminium pans are perfect, so consider one of these if (a) you need another pan and/or (b) you love scrambled eggs. Cleaning a scrambled egg pan is probably one of the best arguments for trying a vegan alternative!

For the voyager new to cooking, I include this recipe because scramblers are so lovely when well made and so liable to turn out disappointingly. To ensure success, don’t let yourself be distracted while cooking them; have the hot plates, toast, etc ready in advance and everyone sitting down in anticipation; use a little milk or water to help them stay moist; don’t use too high a heat.

The best tool for scrambling eggs is a flat, wooden spatula, if you have such a thing.

Serves 2

a large knob of butter – equivalent of a heaped tbsp, or olive oil 

a generous grinding of pepper

seasoned salt

4 eggs

2 tbsp milk/thin cream/water

  • Over a low heat, melt the butter and stir in a pinch of salt and the black pepper.

  • Add the milk and eggs; beat quickly together for a moment until the yolks are broken and blended with the whites. You don’t want them to be totally incorporated as in an omelette.

  • Cook gently, occasionally scraping the setting eggs from the bottom and sides of the pan – don’t stir too vigorously because you want to create soft, smooth curds.

  • When all the egg is set, but before it starts drying out and turning rubbery, serve immediately, usually with hot toast, but it’s also good with freshly-baked bread.

Variations:
  • A little dried, minced garlic is delicious in scramblers at any time, and particularly if the eggs are getting past their best.

  • Add a little grated cheese to the pan, as soon as you’ve put in the eggs.

  • A few fresh herbs go well, especially parsley.

  • Try some cracked black pepper, for a change.

  • A couple of sliced mushrooms, fried in the butter/oil are delicious.

  • Add a sliced tomato, or several sliced cherry tomatoes.

  • If you add a little curry paste to the eggs, before beating them, the result makes a delicious snack on toast or crackers.

  • If you are lucky enough to find wild garlic, this goes beautifully with scrambled egg

Poached Eggs

I love poached eggs, but surprisingly few people make them. I hate those little poached egg devices that are sold: they produce a result completely different from a real poached egg, with its lovely, lacy white, surrounding a perfectly set yolk. So if you feel that you have no room for your egg poacher, take heart: there is a better alternative.

There are two requirements for flawless poached eggs: (1) plenty of salt in the water (or a tbsp of lemon or vinegar, if you prefer, although they flavour the egg quite strongly), which guarantees the white setting; (2) the water must be at a full, rolling boil before the egg is lowered into the pan. For this reason, eggs should be at ‘room temperature’, ie about 18°C (70°F). In very cold places, you may have to cook the eggs no more than two at a time.

Serves 2

2 cups seawater

4 eggs

  • If the seawater isn’t very clean, use fresh water and a tsp salt. Put the water into a large saucepan and bring to a rolling boil.

  • When the water is rapidly boiling, carefully break an egg into it, at one side of the pan. (If you are worried about breaking the yolks, break the egg onto a small plate first, and then slide it in.)

  • Set the timer for three minutes, for a soft yolk.

  • When the water comes back to a vigorous boil, add another egg. Continue in this way until all the eggs are in the pan.

  • Reduce the heat and cover.

  • When the timer pings, remove the eggs from the pan with a slotted spoon, in the same order as they went in.

  • Serve immediately, generously seasoned with black pepper, on hot, buttered toast.

If you find that everything froths up too much, move the lid sideways, to partially cover the pan or turn off the heat as soon as you've added the final egg. Let the pan stand for 6 (soft) or 7 (firmer) minutes and then take the eggs out.

Variations:

  • For Eggs Florentine, cook and drain spinach, season with pepper and serve topped with a poached egg.

  • Instead of butter, spread the toast with Dijon mustard

  • Sprinkle the eggs with a mild ground chilli powder, such as Kashmiri

  • If you like the heat, spread the toast with chilli paste

Fried egg sandwich

I suspect that this sounds pretty revolting to my more fastidious readers, but as they happen to be a personal favourite of mine, I am including them. For perfect fried egg sandwiches, you need decent bread – preferably home made, good-quality tomato ketchup and eggs whose yolks are set, but whose whites are not frazzled.

Serves 2

8 slices bread

tomato ketchup

1 tbsp olive oil OR butter

4 eggs

pepper

Annie’s Mixed Herbs

  • Toast the bread on one side only.

  • Spread a thin layer of tomato ketchup on the untoasted side of each slice of bread.

  • Place a frying pan on the burner. Add the olive oil or butter and before it gets hot, carefully break in the eggs so that they are spread evenly around the pan. Tilt the pan, if necessary to keep them so, or gently move them with a spatula.

  • When the whites start to set and are lifting up and down, break the yolks. Then sprinkle with Annie’s Mixed Herbs and a generous grinding of pepper. Lower the heat and cover.

  • Cook for several minutes until the whites are set. Watery whites are horrible in fried egg sandwiches.

  • As soon as the eggs are cooked, cut the pan full of eggs into four equal portions with a knife and then lift out a piece of fried egg, placing it on the ketchup side of one piece of bread. Put another slice on top and serve at once. If you didn’t cook the yolks hard, fried egg sandwiches can be a bit drippy, so ensure that a plate and tissues are to hand.

Variations:
  • A small onion can be diced and quickly stirred around before adding the fried eggs. Don’t let it cook too long, or the pan will get hot and the whites will then end up crisp.

  • A full-flavoured, but mild mustard makes a pleasant alternative to tomato ketchup. Or try another type of sauce.

  • Some wild garlic, if you come across some, is delicious, snipped over the eggs while they set.


Plain Omelette

These make a pleasant change at breakfast. Ideally, they should be made individually, in 150 mm (6 in) omelette pans, but most boats would not have room for such a luxury. They come out a bit on the thin side, if you make them one at a time in a larger pan, so better to make a four-egg omelette and share nicely.

Serves 2

 
4 eggs
salt and pepper
1 tbsp olive oil
 
Method:
  • Break the eggs into a bowl and beat them lightly with a fork or whisk so that the whites and yolks are combined. Add salt and grind in some pepper. 
  • Heat the oil in a frying pan until it’s runny but by no means smoking. Tip in the eggs and tilt the pan so that the mixture spreads itself evenly around. You can lift up the edges of the omelette as it sets so that the liquid egg trickles underneath. 
  • When the top is almost set, sprinkle on the herbs and as the last of the liquid egg firms up, fold the omelette in half with a fish slice. 
  • Quickly cut it in half and then put each section onto a heated plate. Serve at once.

Variations:

  • Of course, there are innumerable variations on the theme, but for breakfast, you probably don’t want anything too exciting. A little grated cheese would be very acceptable. Add just before you fold the omelette. 
  • You might like to spoon over some jam, if you have a sweet tooth, in which case, leave out the herbs. 
  • Another useful idea is to preheat any of last-night's leftovers and put those in the omelette. But the few herbs are really all most people would want, first thing in the morning, especially if you are fortunate enough to have some fresh herbs on board. 
  • If you fancy something more substantial, make a Spanish omelette or a frittata (see recipe).


Perfect fried egg

For perfect fried eggs, break the eggs carefully into a frying pan with a little oil that is wam, but not yet hot.  Too high a heat makes the base crisp – which some people quite like. However, most people prefer the whites soft, but not runny.  If you like the yolk hard, just pierce it with the point of a knife and let the yolk spread out a little. 

Season with Annie's Mixed Herbs, freshly ground pepper and salt, if you like. Once the white is setting and starting to lift, lower the heat and cover the pan.  This saves you from either having to turn the egg over, or flip hot oil over it to set the eggs.

My mother always told me to use the back of the knife to crack the egg.  She was right!

Banana skin bacon


 This sounds like veganism gone to extremes, but is actually extraordinarily good!

Serves 2

Skins from two bananas

1 tsp smoked paprika

1 tsp soy sauce

  • Take the banana skins and cut off the stalk and the base. Scrape the white ‛pith’ off the skins so that they are almost translucent.  Cut them into strips along the ridges.

  • In a wide bowl, or on a dished plate, lay out the skins. Spoon equal amount of smoked paprika and soy sauce over the skins mixing and turning until the skins are completely covered with the mixture. Add more if necessary.

  • Leave the skins to marinade for a quarter of an hour or so.

  • Add olive oil to a frying pan. Scrape in the skins with any leftover marinade and fry over a fairly high heat, turning them as necessary until they are nicely browned on both sides and turning crisp.

  • Add to a traditional ‛English Breakfast’, or use in Bacon Sandwiches.


Fried bread

As well as being delicious with the 'cooked breakfast' and with eggs, this is also an acceptable substitute for toast, if you have no toaster and aren't counting calories.  Indeed, you can make passable toast in a good quality frying pan, without the oil.

1 tbsp olive oil

1 slice bread

  • Heat the olive oil sizzling hot in a frying pan.

  • Put in the bread, move it around to mop up the oil and then turn it over. There should still be some oil in the pan and you should mop this up, too.

  • Keeping the heat high, cook the bread until it starts getting crisp and some of the oil that has been absorbed starts to run out again. Turn the bread. If it isn’t sufficiently brown, flip it back for a bit longer.

  • Then cook the other side. When it’s properly cooked, it should be crisp on both sides.


Refried Potatoes

These are so delicious, that I often cook extra potatoes the night before so that I can have them for breakfast next day.

Ingredients
 
Cold boiled potatoes
1 tbsp olive oil
salt and pepper or Annie's Seasoned Salt
 
Method:
  • Cut the potatoes into chunky pieces, while heating the oil in a frying pan.
  • Ensuring that the oil is hot, put the pieces of potato into the pan. Although it’s a bit fiddly to do them one at a time, it actually makes sense, because all the pieces are in contact with the oil and can be turned over to brown the next face.
  • By the time you’ve put every piece in the pan, you can start turning the ones that were put in first. Ideally, they fry brown and crisp. Grind salt and pepper over them while they’re cooking.
  • When they’re all heated through and crisp, serve with fried or boiled eggs, a fried tomato – or just one their own!

Breakfast pancakes


Serves 2

1½ cups milk OR water

2 tbsp olive oil OR melted butter

1 egg OR ¼ cup water

1 cup flour

1 tsp baking powder

1 tbsp ground flax seeds

  • Measure 1¼ cups of the milk into a jug or bowl. It should be at least ‘room temperature’, because if it’s too cold, even a hot frying pan will be insufficient to raise the batter. If in doubt, warm it until it’s ‘hand hot’.

  • Add the oil or butter and then whisk in the egg or flax seeds/water. Dump in the flour and then whisk.

  • Add the baking powder and whisk again. Check the consistency. Made with wholewheat flour, this can vary, depending on the absorbency of the flour. For thick pancakes, the batter should drip off the wires of the whisk, but only just. If it seems too thick, add some more milk or water. If you’re uncertain, test a teaspoon or so of batter and see what it looks like. Normally, you will need all the milk. Leave it to stand for about 10 minutes.

  • Put your frying pan over a high heat. If you feel it might stick, put in a few drops of oil – the pan acts as a griddle: you don’t fry pancakes.

  • Sprinkle a few drops of water onto your frying pan. If it’s the right temperature, they should dance across the surface before evaporating. Now drop a couple of tbsp of batter into the pan. It should immediately start to bubble and then cook dry around the edges.

  • When about a third of the pancake looks dry, turn it over to cook the other side. You should be able to get a production line going and cook about three at a time. Keep them between two warm plates, or in a low oven until they’re all cooked. Regardless of what the pundits say, they seem to stay fine like this and don't need to be layered with greaseproof paper.

Serve with jam and yoghurt, preserved fruit and cream, or whatever takes your fancy.

23 October 2022

Thrifty Smashed Potatoes


In my wanderings through food blogs, I keep coming across the serving suggestion of ‛smashed potatoes’ and for a long time, I assumed that this was a new and trendy way of saying ‛mashed potatoes’.  However, I saw a recipe for them, linked under something else I was looking for and All Was Revealed.  

I suspect that the better celebrity cooks are trying to improve people’s dietary habits; they also realise that many of their fans are as lazy as the rest of us (and probably much more so than their grandparents) when it comes to cooking, so they make a lot of use of an oven, on the principle that it does the work without being supervised. I thoroughly endorse their first goal – smashed potatoes retain their skins; I am much less enthusiastic about the latter – ovens require a lot of energy and we should all be using as little as possible.  (I should be so much happier if celebrity cooks and food bloggers enthusiastically endorsed counter-top ovens, which are, of course, a complete irrelevancy to Voyaging Vegetarians.  Apparently, according to Vegan Punks, smashed potatoes can also be finished in an Air Fryer, which is even more of an irrelevancy!)

Anyway, below is my way of producing smashed – or far more accurately, squashed – potatoes without an oven.

Serves 2
 
8 smallish potatoes (about 50mm diameter), scrubbed
½ tsp garlic granules
1 tsp Annie’s mixed herbs
salt and pepper
olive oil


  • Put the trivet in the pressure cooker, add (sea)water just up to the level of the trivet, put in the potatoes and cook at full pressure for 5 minutes

  • Reduce the pressure at room temperature

  • Put a large frying pan over a low heat and add some olive oil – just enough that you can swirl it round the pan.

  • Take a potato, put it on a chopping board and just split the skin with a sharp knife, in a cross – if the skin is a bit tough, it may not split on the top of the potato unless you do this.

  • Now take a broad spatula, or – if you don’t mind making washing up – the base of a cup and gently squash the potato so that it splits into several lumps, still joined by the skin at the bottom. Carefully lift it into the frying pan, followed by the others, dealt with in the same way.

  • Sprinkle them all with garlic, Italian seasoning, salt and pepper and cover. Cook for about 15 minutes until the base of the potatoes is crisp. If you cook the potatoes first, they can be crisping up while you make the rest of the meal. They will stay hot long enough for you to cook a separate vegetable, too, if you only have two burners.

These potatoes are, in fact, a great substitute for mashed potatoes: not everyone likes peel in their mash, but most people love crispy potato skins!

Variations:

  • You can use whatever herbs or spices take your fancy, of course and fresh ones would be lovely.

  • I suppose you could always serve these smashed potatoes ‛loaded’ as USAnian food bloggers would say, which I gather means covered in whatever takes your fancy. I’m not a fan of heaps of different ingredients piled haphazardly on top of something else, but I can see the toppings that you might put on baked potatoes, to turn them into a full meal, would work well on smashed potatoes.

27 September 2022

Janette's "slow cooker"

I am not as organised as I would like to be, when it comes to cooking.  Often I can't decide what to eat until the last minute and the only thing I can pat myself on the back for, is that sometimes I at least decide I'm going to eat, for example chickpeas, and an hour before I usually start cooking, I pour boiling water over them in preparation.  Then I have plenty of time to look through recipes and decide what to do with them!

My friend, Janette, who drew all the sketches on the Topics for Voyaging Vegetarians, is a much more organised person than I am.  While I, of necessity, use my pressure cooker most nights, she thinks ahead and uses what is effectively a (nearly) energy-free, slow cooker.  It uses the same principal as a Hay Box, but is a much more sensible size for a small boat: in fact, you can fold it up.  Best of all, you can make it yourself for very little outlay.

She writes: "you might be interested in one of my latest makes. I made a thermal cosy for my biggest saucepan.  I have been interested in thermal cookers for a while, but most of them take up too much room, like the Wonderbag, which you might have seen in South Africa, or some that look like huge cooler boxes.

"I made mine from a windscreen sun shield. The folds were the right height for the pan, I sewed them together cutting a hole for the handle, then cut a couple of covers for the lid, using the black tape, and elastic from the original to finish it off.  The best part is that it folds away.  

"It really works as a sort of slow cooker.  Once the soup or stew has been brought to boiling, you can leave it for an hour or two, and it is still hot.  If you leave it longer,  you can always bring it to the boil again before serving.  Being vegetarian, and using tinned beans, it can save on fuel, another advantage we have over the meat eaters."

When you take the cost of fuel into account, tinned beans can often make sense, especially if you have to buy them from a supermarket, rather than some sort of co-op or similar.  I have to walk a long way to dispose of my recycling, so prefer to use dried beans for that reason alone.  I tend to buy in bulk (well, bulk for a single person!), when I get the opportunity either to do a big order on line that reaches the 'free postage' threshold, or when I get the chance to go into a town that has a Bin Inn, which is a shop where you take your own containers and fill from a bin of beans, nuts, grains, etc.

I think this is a brilliant idea and it could be adapted to make a cosy for keeping yogurt warm while it sets, or wrapping around a bowl while bread rises.  

Let me know in the comments what you think about it!

31 August 2022

Welcome to "The Voyaging Vegetarian"

Kia ora and welcome to The Voyaging Vegetarian.

For many years, I intended to write a book of this name, but for almost as many years, the number of people likely to be interested in it could be counted on the fingers of one hand.  However, thankfully people are becoming more aware about the plight of many of our farmed animals and the terrible burden they place on our planet, due to their biomass and food requirements, so I think its time has come.

I have decided to 'publish' the book in the form of a blog, because this makes it a lot easier to add recipes and enlarge on ideas as time goes by.  There are very few voyagers these days who have no mobile phone or tablet, and blog pages can be copied and pasted for use under way, so I hope it will be a user-friendly method.

How to use this blog


This blog is really divided into two parts: one part is related to boats and food, the other is simply the recipes.  With all the zillions of food blogs on the Internet, I doubt that anyone who isn't interested in boats is going to stumble across this, but by separating pages from posts, it means that should this unlikely event happen, voyagers can go to find information, but that anyone can go to find a recipe.

If you are interested in ideas around a voyager's galley, you will find an article about it, under Topics, as A Voyaging Galley.

If you want to find a pasta recipe, you can use the search function at the bottom of the post, click on pasta on the labels, or go to the list of Topics and have a rummage through Pasta, Potatoes, Rice, etc.  This last choice will also bring you to the topic with reference to voyaging.

Topics on Breakfast, Bread, Soup, Salads and other food categories include different recipes, linked to posts in the blog, so you can simply go to this topic for a quick  look at what is available.

Recipes are usually pretty straightforward: I love cooking, but have limited resources in my boat galley, I live on a fairly tight budget, I don't want to waste litres of fresh water by making a lot of washing up and I'm aware that things like canned, fire-roasted tomatoes don't even exist in many countries (including, as far as I can tell, New Zealand), and that jarred red peppers aren't a very good choice for someone who doesn't have a fridge.  Lots of voyagers don't have ovens and ovens are often expensive to run, so the blog isn't groaning under the load of yet more recipes for roasted vegetables. 

Recipes rarely call for more than two pans and I try and suggest alternative ingredients, knowing that often you might be anchored somewhere that simply doesn't sell broccoli or green beans.  I am a slow cook - one of the slowest I know - so I don't give suggestions as to how long the food will take to prepare.  Generally, the list of ingredients isn't that long.  However, I love making curries with lots of different spices, so I will be including these along the way for other people who might also enjoy them!

All (or nearly all) recipes are tagged and I add extra ones to indicate both the ingredients required and the complexity of the meal.  Voyaging, implies that this is a meal that can nearly always be cooked underway and with the ingredients that most boats will still have on board, after a couple of weeks at sea.  Cruising implies that you will be sailing in moderate conditions and that you will have a greater range of fresh produce available.  Thus you might have broccoli or green beans, but are unlikely to have fresh spinach, which - without refrigeration - only keeps for a day or two.  Any recipes suggesting using a blender comes under this label, the assumption being that you are probably cooking in fairly mild conditions.  The final tag: At anchor implies either that you require super fresh ingredients or calm conditions.  Occasionally, therefore, At anchor food could be cooked a thousand miles from the nearest land, in calm conditions.

All comments about how effective this method is are welcome and I shall try to make improvements when people suggest them.  All comments are moderated, ie they aren't published until I have read them.  This means that it's quite safe to leave your email address, should you want to.


27 August 2022

Basic White Sauce - and Variations


Basic white sauce is needed for Welsh rarebit, custard or lasagne. Proper Sauce Béchamel is made by lovingly stirring 2 tablespoons of white flour into 2 tablespoons of butter over a low heat for three or four minutes. It’s then cooled and a cup of scalded milk is added. Into the pan goes a small onion studded with 2 or 3 cloves and half a bay leaf. This is then cooked until thick and smooth, after which it’s put in a moderate oven for 20 minutes, before straining and seasoning. If you’re in a hurry, you can simply stand and stir it until the sauce has thickened and all the floury flavour has gone. I believe sailors usually have other things to do and go for a lowbrow, non-gastronomic alternative, using cornflour. It’s incredibly easy to make well in one pan and yet cookery writers insist on making a big issue of it, with suggestions for double boilers, pre-heating the milk, etc, etc, which is a lot of trouble and results in extra washing up.

The simplest of white sauces consists of milk, cornflour and either salt and pepper or sweetening. After that, all sorts of goodies can be added, but let’s start from zero. The following recipe makes enough sauce to coat a lasagne, provide four servings of custard, and make a generous amount of Welsh rarebit for two.

 
Serves 2
 
Ingredients
 
2 tbsp cornflour
1 cup milk
salt and pepper
 
 Method:
  • Put the cornflour into a small saucepan and add about a quarter of the milk.
  • Blend until all the flour is mixed and a smooth thin paste results.
  • Add the seasoning and then the rest of the milk. Mix again.
  • Put the pan over a medium-high flame and stir the sauce constantly and fairly briskly until it starts to thicken. (You can tell that this is going to happen when it starts coating the side of the pan and the back of the spoon.)
  • Still stirring, lower the heat and let the sauce boil.
  • Once it’s boiling, continue cooking and stirring for one full minute and then remove the pan from the heat. This ensures that the starch is properly cooked. If it isn’t, it spoils the flavour of the sauce.

Notes

For best results, you need a first-rate saucepan. Too many stainless steel ones cook unevenly with the result that the sauce goes into lumps. If you have any doubts about your pan, use a flame-tamer and as low a heat as your patience will permit. Even with a whisk, once lumps have formed they’re almost impossible to remove. If using dried milk, add it as you mix in the cornflour, so that it dissolves when you heat the water.

This method guarantees you a smooth, cooked, white sauce.  Proper cooks use white flour instead of cornflour, in many instances, saying that it gives a better appearance – a sauce made with cornflour has a sheen on it that you may not want.  Food reformists object to using cornflour, because it’s super refined and has no nutrition apart from carbohydrate.  If either of these are your view, you can use wheat flour instead, but it will need about ten minutes cooking and really should be blended with a knob of butter, over a low heat before you start, to reduce the floury taste. You do not need to stir continually, once it’s brought to the boil, but keep an eye on it in case it catches and burns. You need 2 tbsp plain flour for 1 tbsp of cornflour. And you might want to have white flour for this purpose, so that you don’t have brown bits in your white sauce. But white flour is not as nutritious as whole wheat. Sigh. Nothing’s ever easy.

Best alternative: However, in my opinion by far the best way of making a quick Béchamel sauce, which has more flavour than that made with conrflour, cooks more quickly than that made with wheat flour and looks more attratctive than either, is to use gram (chickpea) flour.  This gives the sauce a delicate hint of yellow, which looks very attractive.  

 
Ingredients
 
  4 tbsp of gram flour 
knob of butter or 1 tbsp oilive oil
1 cup (plant) milk
1/2 tsp onion powder
 salt and pepper
 
Method:
  •  Melt the butter or warm the oil in a small saucepan, over a medium heat.  Mix in the gram flour and cook gently for a few minutes.
  • Add about 1/4 cup of milk and blend carefully, ensuring that there are no lumps. Then add the rest of the milk and the onion powder and raise the heat slightly and bring to a slow boil. Season with salt and pepper to taste.
  • Gram flour can sometimes go through a lumpy stage as it thickens: just keep on stirring untl it's smooth.  It needs longer cooking longer than cornflour, but 5 minutes after it's become smooth should be plenty.  Taste it and see.  Raw gram flour tastes unpleasant - you will easily taste if it needs more cooking.  Adjust seasoning.
The above recipes will give you an exceedingly boring and bland white sauce. Personally, I think white sauce is pretty boring at the best of times and have never been able to see the logic of dumping a cup of it on an innocent cauliflower. The following suggestions and variations will help turn it into something that complements the rest of the food.
 
Variations:
  • The first thing you can do to improve it is to add a large knob of butter with the seasoning. Once you have your confidence, you can actually melt this first and then stir the cornflour into it. A dollop of olive oil also enriches it.  
  • If you have the patience, it’s well worth infusing the milk with flavourings. A tea infuser is useful for this: put a broken bay leaf, and a pinch of whatever herbs you fancy into the infuser and leave it for ten minutes or so in very hot milk. If you want something even better, a piece of onion, a garlic clove, a chunk of carrot, a couple of pieces of parsley, some mushroom stems, some broken cinnamon, a blade of mace – any or all of these can add a bit of character to a basic sauce. Put them in the cold milk and bring gradually to simmering point. Don’t boil or you’ll end up with a skin to deal with. Cover the milk while the flavours infuse, so that it stays warm longer. Be careful with mushrooms if you want a white white sauce, because they can colour it. Strain through a sieve before using. If you have any light-coloured vegetable stock, this is a good addition: mix it with dried milk.
  • Cheese. Oh, lovely, wonderful cheese!  I dare say you can buy really good vegan cheese in large, cosmpolitan cities.  I have yet to find any, but as mentioned below, there is an acceptable alternative vegan sauce.  A generous addition will turn this boring gloop into a delightful adjunct to your vegetables and make an instant meal with pasta. Choose a cheese with a pretty strong flavour and grate away. A quarter of a cup will add interest; half a cup is about the minimum to give it a definite flavour. 
  • Vegan cheese sauce can be made by substituting a couple of tbsp of nutritional yeast for the real thing I’ll be honest, it won’t be as good, but it will still be a vast improvement on white sauce. However, if you go to the trouble of infusing the milk and then add 1/2 tsp lemon juice and 1/2 tsp dijon mustard, it will be much improved. 
  • Lemon juice. A tablespoon of this will add savour to your very basic sauce and complement carrots, for example. If you’re using a fresh lemon, add some of the rind, grated. This has much more oomph than the juice and adds a little colour. With the addition of honey, you will end up with a sweet sauce to go with puddings.
  • Dried or mixed mustard, Worcestershire sauce, chilli: all these can be added to a standard white sauce to enhance the flavour, without substantially altering the texture. They will alter the colour, however.
  • Green peppercorns, celery salt, dried minced garlic, and fresh or dried herbs will introduce a lot more character into the sauce, but will spoil the pure, unsullied whiteness, if this matters.
  • If you add two, chopped, hard-boiled eggs, some chopped parsley and the rind and juice of half a lemon, pour it over cauliflower and sprinkle with a cup of breadcrumbs, fried in olive oil or butter, you end up with Cauliflower à la Polonaise. This turns the cauliflower into a main course and is great with deep-fried chunks of potato or Oven chips. Broccoli, courgettes, etc can be given the same treatment.
  • A tablespoon or two of Dijon mustard makes for a very pleasant sauce with burgers.
  • Fresh mushrooms fried in butter or olive oil, can be added to make a quick pasta sauce. Season with 1 tsp crushed green peppercorns, ½ tsp tarragon and/or dill (weed) and a clove of garlic. You could add a chopped onion and fry it with the mushroom, if you like. If you feel confident about making white sauce, the mushrooms can be fried in the saucepan and the cornflour added to that, to ensure that none of the delicious flavour is wasted. Use cream and you have a meal fit for a king!
  • For a sweet sauce, omit salt and pepper and after the sauce is thickened, stir in a tbsp of honey and return to the heat. It can be further flavoured with vanilla essence, lemon juice or rind, orange juice or rind, rum, whisky, cocoa, coffee, etc. Brown sugar or treacle can be used instead of honey, for a different flavour – and colour.
  • For extra richness, incorporate some cream. After the sauce has boiled, allow it to cool a little and then gently stir in the cream. If you need to reheat it, do so very gently so that it doesn’t boil, otherwise the cream may curdle.
  • For custard, or lasagne, an egg, beaten in, adds extra richness. The easiest way to ensure that this doesn’t curdle, is to do the same as with cream. If the sauce is too thick, add a little more milk and heat it very carefully.